Showing posts with label Autumn. Show all posts

Tuesday, December 8, 2009

Apple PIe


Apple Pie is the BEST pie.

Well...actually...my FAVORITE is Boysenberry Pie. And there was this one time, while visiting my Grandma Ewing in Washington, that I picked BOWLS of wild blackberries and she baked me TWO Blackberry Pies...which will live as one of the best days of my life in my memories FOREVER.

But Apple Pie is pretty much darn near the most perfect pie in existence. And much more easily attained than the two above mentioned variety's of pie...

I love apple pie, and wanted to share my very favorite, best EVER, Apple Pie recipe with you...

Now, you can make your own crust...and sometimes I do...but usually I just use Pillsbury Refrigerated Pie Crust. It is easy and comes out great. So, the choice is yours...


Apple Pie

One pkg. Pillsbury Refrigerated Pie Crust or enough pie dough to make a double-crust pie
8-10 Granny Smith apples, peeled, cored, and thinly sliced (about 1/4-inch or so)
1-2 TBS lemon juice
1 cup sugar
2 TBS all-purpose flour
1/2 tsp ground cinnamon
1/8 tsp ground nutmeg
2 TBS butter (chopped into chunks)
1 egg
Additional cinnamon/sugar mix to sprinkle

1. Preheat oven to 375. Spray your pie dish with Pam. Roll out half of pie crust and arrange it in pie pan, pressing gently to curves and walls of dish. Allow generous hang-over from edge of dish.

2. Toss apples into a large bowl and sprinkle with lemon juice. Add sugar, flour, cinnamon, and nutmeg, and stir until completely coated.

3. Transfer apple mixture to pastry-lined pie dish. Fill to HEAPING...apples should be spilling off. Try and get them all to stay put long enough for you to dot with butter and cover with second crust (which you may have to roll a bit thinner and wider to cover and overhang the apples.) If you can't fit all the apples in, that's okay...but make sure you get all the yummy cinnamon juice that has collected at the bottom of the bowl into your pie. If you have to, remove those excess apples and pour juice over what managed to stay put in pie. Pinch crusts together using thumb and fore and middle fingers to create "lace" at edge of pie. Trim excess, but save for later.

4. Cut vents in top of pie. Now...there are two ways you can glaze the crust...either using a WHOLE egg, or just the white. Depends on the look you're going for and the amount of golden-ness you want. So decide your look (I go back and forth...this year I used a whole egg), beat your egg in a cup, and with a pastry brush, GENEROUSLY glaze your top crust in an egg wash. Sprinkle with cinnamon/sugar mixture.

5. If you desire...you can use extra pie crust to make leafy cut-outs to decorate the edge of your pie. OR...you can use those extras to individually wrap some of the apples that just WOULDN'T STAY PUT in your pie for mini tarts. My mom always had mini pie dishes and made jelly tarts with the extra dough for us to munch on while we waited for the Thanksgiving Feast. OR - just throw it away and say: "Hey...I made an apple pie today...and that was enough!".

6. Rip aluminum foil into strips and spray with Pam, and cover pie edges so they don't burn. Bake about 30 minutes, remove foil, and bake an additional 20 minutes or until top is golden (mine got a little dark on top because I got distracted with laundry...but it is still gorgeous).

7. Cool on a wire rack and serve with ice cream. YUM!!!

(It is normal for pie to "fall" a bit as it cools...DO NOT FREAK OUT!!)


courtesy me!!!

Thanksgiving Stuffing

I love Thanksgiving. I'm awfully protective of it, too...like, I get very upset when the retail stores go straight from Halloween to Christmas decorations without even a nod to Thanksgiving (and all in July, too).

There are two things that I love MOST OF ALL for Thanksgiving, and they are Stuffing and Apple Pie.

This year, we went to friends for Thanksgiving dinner, and my friend asked me to bring my favorite thing...so I brought....STUFFING AND APPLE PIE.

Seriously...I was that predictable.

So I thought I'd share these amazing recipes with you...and you can try them out and see if they aren't just the best dad gum Stuffing and Apple Pie recipes out there!!!

I ALWAYS make a double batch of this...because I want to eat for 3 solid square meals for AT LEAST two days after Thanksgiving...so double if you're like me or are expecting a lot of holiday guests...


Thanksgiving Stuffing

1 bag Pepperidge Farm Cubed and Seasoned Stuffing (in a bag with red title)
a good cup and a half of chopped celery
a good cup and a half of chopped onion
Chicken broth (however many cups it says to have on the back of the bag of stuffing...I think 3)
1 STICK of butter (get the good salted sweet cream stuff)
a cup of whole button mushrooms, drained (about two jars worth)
One pound ground sausage (I usually go for the maple flavored)
3 Granny Smith or Liberty apples, peeled, cored, and diced (optional)

1. You're pretty much preparing the stuffing according to package directions, with a few minor adjustments. You're adding MORE celery and onion than called for, for example...so get that all chopped up...

You're also using a WHOLE STICK of butter. I think the guidelines call for 6 TBS...but you're just going to use the whole 8. So put that on a skillet and melt it, and add the onion and celery, and saute until onion and celery are almost soft. If you're lucky enough that your family will let you use apples, you cook them with the onion and celery, too. My family doesn't like apples in their stuffing, so I don't always get to add them. The beauty of doubling this recipe is that you can make one batch WITH apples, and one WITHOUT.


2. Meanwhile, brown up that pound of sausage.MMMmmmm....smells good.


3. When onion and celery are soft, add mushrooms and heat through.


4. Add sausage and remove from heat, stirring to combine flavors.


5. Heat your chicken broth to boiling, remove from heat and add bag of stuffing AND onion/celery/sausage/mushroom/possibly apple mixture. Stir/Fluff gently until moist.
6. Now...stuff your bird, but save some to stick in the oven, covered at 350, for about 30 minutes. If you want that yummy crispy top to your stuffing, remove the covering for the last 5 to 10 minutes, or after its had it's 30 minutes, put it under the broiler for a couple minutes.


This is so good...you'll never embarrass yourself by making Stove Top again!!
courtesy me!!!

Saturday, November 14, 2009

Stuffed and Baked Acorn Squash

This recipe has been adapted from several others and made my own. I claim it. It is one of my favorite things to eat in the fall...I literally cannot get enough...and I want to share it with the masses because I am feeling uncharacteristically generous today...

On a side note: This is NOT my hubbys favorite dish. He calls it "chick food". So that means more for me...and the kids...

On a sider note: This can be a side dish OR an entree...it depends on how you serve it. Tonight it was our entree, served with a spinach salad and a hearty shepherds bread. But I've served it both ways...


Stuffed and Baked Acorn Squash
-
2 medium acorn squash, halved and seeded
4 large baking apples, peeled, cored, and diced (I use Granny Smiths)
1 ripe pear, peeled, cored, and diced
1 pound sausage (preferably Italian sweet or chorizo)
4 TBS dark brown sugar
1/2 tsp ground cinnamon
1/4 tsp ground nutmeg
4 TBS butter
1/4 cup apple cider
1 TBS dark rum (optional)
-
1. Preheat oven to 325. Butter a baking pan. Place acorn squash in baking dish CUT SIDE DOWN. Add 1/4 inch hot water to pan. Bake for 45 minutes.
-
2. Meanwhile, brown and drain sausage. Set aside.
-
3. In a large bowl, mix apples, pear, brown sugar, cinnamon, and nutmeg. In a large skillet, melt 4 TBS butter. Add apple mixture and cook until fruit is golden brown, about 5 minutes. Stir in cider and rum. Simmer, stirring often, until the fruit is tender, about 8 minutes. Add sausage and heat through, being careful not to overcook the sausage.
-
4. Remove squash from oven; pour off water from pan and turn squash cut side up. Fill squash with apple/sausage mixture. Bake until squash is tender, about 15 minutes more.
-
Viola!
-
courtesy me!!!

Wednesday, November 11, 2009

Iron Chef Miami: November 2009 - Gingersnap Crumble Pumpkin Parfaits

And the winner is...ME!!! With the Gingersnap Crumble Pumpkin Parfaits!!!


Aren't they pretty? They're yummy, too...and an original way to serve pumpkin...enjoy!!!


Gingersnap Crumble Pumpkin Parfaits
-
1 qt. vanilla ice cream
1 15-oz. can pumpkin
2 TBS packed brown sugar
1-1/2 tsp pumpkin pie spice
1/2 tsp salt
1 cup whipped cream
Additional pumpkin pie spice
1-1/2 cups crushed gingersnaps
1/4 cup melted butter
-
1. Prepare Gingersnap Crumble by stirring crushed gingersnaps with 1/4 cup butter until just coated. Set aside.
-
2. Place ice cream in refrigerator for 30 minutes to soften. Combine pumpkin, brown sugar, pumpkin pie spice, and salt. Stir ice cream to soften further; fold into pumpkin mixture. Cover and freeze 20 minutes or until mixture holds it's shape when heaped with a spoon.
-
3. Spoon ice cream into parfait glasses; sprinkle with Gingersnap Crumble. Cover and freeze until firm (4-48 hours).
-
4. Before serving, top with whipped cream and sprinkle with additional pumpkin pie spice...
-
courtesy Shannan Johnson

Iron Chef Miami: November 2009 - Pumpkin Dip

Melodee made this yummy dip for apples...and as an added bonus, she sprinkled the apples with cinnamon and sugar!! It was like having apple and pumpkin pie together!!!


Pumpkin Dip
-
1 (8-oz) package cream cheese, softened
2 (7-oz) jars marshmallow creme
1 (15-oz) can solid pack pumpkin
1-2 teaspoons pumpkin pie spice
-
1. Mix together, serve with sliced apples and gingersnap cookies.
-
courtesy Melodee Cooper; adapted from Kathi Boix

Iron Chef Miami: November 2009 - Pumpkin Bars

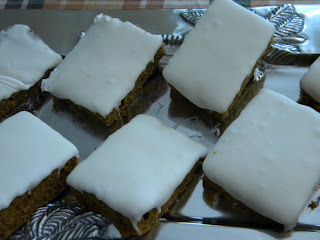
Ann's' entry into Iron Chef were these luscious pumpkin bars with a decadent cream cheese frosting! Yum!


Pumpkin Bars
-
4 eggs
1 cup oil
2 cups sugar
2 cups flour
1 tsp. baking soda
1 tsp. baking powder
2 tsp salt
2 tsp cinnamon
1 15-oz. can pumpkin
-
1. Mix eggs, sugar, and oil. Add dry ingredients. Add pumpkin and mix well.
-
2. Pour into a greased 11x17 cookie sheet. Bake at 350 for 30 minutes.
-
Frosting
-
1 (8-oz) cream cheese, softened
3/4 cup stick butter, softened
1 tsp vanilla
1 tsp milk
3 cups powdered sugar
-
1. Mix until smooth and spread on bars after they are cooled
-
courtesy Ann Merrill

Monday, November 2, 2009

Autumn Pasta Toss

This is my kind of recipe...first of all, it involves pasta, and pretty much anything involving pasta gets a big seal of approval from me. Secondly, it uses lots of fresh veggies, and at their seasonal peak. Another big gold star. It also uses very subtle seasonings, relying on the actual veggies to flavor the dish...making it taste very fresh. It's a really enjoyable dish...

We serve this with freezer garlic bread, and a nice romaine salad with red, orange, and yellow peppers. Go ahead and double if you're feeding more than 4...


Autumn Pasta Toss
-
1 lb. penne pasta, uncooked
1/2 cup Italian Vinaigrette dressing
1 small onion, chopped
1 lb. butternut squash, peeled, cut into medium cups
6 oz. shittake mushrooms, stems removed, caps thinly sliced
3/4 lb. Brussels sprouts, trimmed, quartered
1 cup chicken stock
1/2 cup shredded Parmesan, Romano, and Asiago cheese, divided
-
1. Cook penne pasta as directed on package.
-
2. Meanwhile, heat dressing in large skillet with tight-fitting lid on medium-high heat. Add onions and squash; cook 5 minutes, stirring frequently. Stir in mushrooms and Brussels sprouts; cook an additional 5 minutes. Add chicken stock; stir until well blended. Bring to boil. Reduce heat to medium-low; cover. Simmer 5 minutes or until vegetables are tender.
-
Note: Jason actually made dinner tonight...and he recommends partially steaming squash first to assist in softening. Otherwise, prepare to spend longer than the recommended time at the stove cooking squash.
-
3. Drain pasta; place in large serving bowl. Add vegetable mixture and 1/4 cup of cheese; toss lightly. Sprinkle with remaining cheese. Serve warm.
-
courtesy Kraft foods

Thursday, October 29, 2009

Harvest Ratatouille


Yummy, yummy, yummy...warm food in my tummy...

I made ratatouille tonight...but a simpler version than the Thomas Keller recipe I posted earlier. I thought perhaps that some people might be a little...intimidated...by copying a famous chef's recipe (although it is PAINFULLY simple)...so I am making a simpler version with a happy autumn name.

Don't bother doubling...just serve with French bread. It is VERY hearty. Enjoy!!


Harvest Ratatouille

1 medium onion, chopped

2 TBS oil

1 medium unpeeled eggplant, cubed

1 medium zucchini, cubed

1/2 of a medium red pepper, chopped

1/2 of a medium yellow pepper, chopped

1 clove garlic, minced (I always add more)

1 can (28 oz.) whole peeled tomatoes, drained, cut up

1/4 cup Sun-dried Tomato salad dressing

1/4 tsp thyme

1/4 tsp salt

grated Parmesan cheese

1. Cook onion in hot oil in a large skillet on medium heat for about 10 minutes or until lightly browned, stirring occasionally. Add eggplant, cook and stir 5 minutes. Add zucchini, peppers, and garlic; cook and stir 5 minutes.

2. Add tomatoes, dressing, thyme, and salt; bring to a boil. Reduce heat and cover. Simmer 30 minutes or until vegetables are tender, stirring occasionally.

3. Serve topped with Parmesan cheese.

courtesy Kraft foods

Pumpkin Tea Bread and Apple Cider Punch

Okay, this post has possibly the lamest picture EVER in the history of food blogging.

It's because I am just as busy as a slightly unbalanced bumble bee. See...on Tuesday, I had a Girl Scout Halloween Party at my house, and I spent all day cleaning and running errands. And then at the party...we made caramel apples, and there was caramel EVERYWHERE!! Then we played games like the one where you eat the donut off the string without your hands. And all those crumbs, combined with more crumbs and sugar from various other cupcakes, cookies, and candies all stuck to the caramel...and...well, you get the picture. Walking across my floor was like crossing a sticky mine field.

So I had to get up super early to clean AGAIN, and then bake because I had a recipe group to attend. The theme was "Autumn", and I wanted to make my Pumpkin Tea Bread and Apple Cider Punch, since I'm not using either recipe for November's Iron Chef competition.

Anyway - of COURSE I ran out of time, and had to be all crazy...and that is why, my friends, I know hold the title for taking the crappiest food blogging photo ever...which is really saying something if you look through this blog and see how crappy most of my other pictures are...

You need to forgive the yellow tint to most of the photos...it was around 5:30am, and the fluorescent lights in my kitchen are not attractive lighting.


Pumpkin Tea Bread

this is a recipe from the Fraley Family archives

2/3 cup shortening
2-2/3 cup sugar
4 eggs
1 pound can pumpkin
2/3 cup water
3-1/2 cup flour
2 tsp baking soda
1-1/2 tsp salt
1/2 tsp baking powder
1 tsp cinnamon
1 tsp ground cloves

1. Preheat oven to 350 and grease and flour bundt pan.

2. Mix shortening and sugar until fluffy.

3. Add all liquid ingredients - mix until blended. Sift dry ingredients together and add to pumpkin mixture. Mix well.


4. Bake at 350 for 1 hour and 10 minutes.


5. Remove from oven. Let cool, then flip onto serving platter. Drizzle with powdered sugar icing.
and now I humbly present the WORST food picture EVER...taken as I'm about to drive away and remember that I never took a picture of the finished bread...(drum roll, please...)


recipe courtesy Fraley Family Archives
Apple Cider Punch
6 cups apple cider
2 cups cranberry-raspberry juice OR orange juice
1/2 cup lemon juice
1 bottle sparkling white grape juice
1. Combine all juices EXCEPT sparkling white grape juice.
2. SLOWLY add sparkling white grape juice.
3. Serve immediately.
courtesy Fraley Family Archives

Wednesday, October 14, 2009

Skillet Stuffed Peppers


Have you noticed how expensive bell peppers are lately? Am I the only one to notice? Did they just suddenly leap in price, or was it a gradual ascent that I didn't notice until it was so high I had to say: "DAMN!! Those there are some expensive peppers!"

I don't know the answer, but I do know that when my local grocery store had peppers on sale for .99 a pound, I had to buy 'em (we'll discuss the fact that .99 a pound is a sale price at a latter date...when my heart stops palpitating at the sight of an empty bank account).

One of my FAVORITE autumn/winter recipes is Skillet Stuffed Peppers. I don't really know why...they are not especially autumn or fall dishes...that's just when I like to cook them.

This recipe is really easy...it uses copious amounts of A-1 sauce, which my children love. I always double the filling, because my kids are less for the peppers and more for the meat/rice mixture. I also only cook 4 peppers, instead of the recommended 6, because my kids can't eat a whole pepper (although they eat TWICE the suggested meat/rice filling)...so I cut the peppers in half and give them extra insides. And you steam buttered carrots right along with the peppers, which are a huge hit for veggie choices at my house...so this is an all-around family friendly recipe.

We served it with those pop-from-a-can Pillsbury biscuts...so very gourmet!!


Skillet Stuffed Peppers

1/2 cup cooked rice
3/4 lb ground beef
1/4 minced fresh onion
3 TBS A-1 sauce (I use more...but it's a personal preference thing)
1 tsp salt
1/4 tsp pepper
1 8-ounce can tomato sauce
1 12-ounce can whole kernel corn, drained
6 large green peppers
6 medium carrots, peeled and cut into 1-inch pieces (or you can use the pre-peeled, ready-to-eat baby carrots like I do)
3 TBS butter
1/2 cup water

1. While rice is cooking, in medium skillet brown beef until crumbly (I add extra several dashes of A-1 to cook into the meat...we like it a bit spicy). Add onion. Cook until onion is soft. Remove from heat. Mix in A-1, salt, pepper, tomato sauce, corn, and rice.


2. Cut tops, seeds, and membranes from peppers. Discard. Fill peppers with meat and rice mixture.
3. In a 10-inch skillet (I use my stock pot), place peppers and carrots. Add butter and water. Simmer, covered, 30-40 minutes, or until carrots are tender.
courtesy Best Recipes from the backs of Boxes, Bottles, Can and Jars by Ceil Dyer